
Table of Contents
- Identifying the Source of a Roof Hatch Leak
- Preparing and Drying the Roof Surface
- Roof Hatch Flashing Installation and Sealing
- Roof Hatch Gasket Replacement Process
- Choosing the Right Roof Sealant and Patching Products
- Roof Hatch Leak Repair: Applying Roofing Cement and Liquid Sealants
- Roof Hatch Maintenance Checklist and Post-Repair Verification
- Safety Considerations and When to Hire a Professional
- Frequently Asked Questions
Last Updated: October 10, 2026
Identifying the Source of a Roof Hatch Leak
A roof hatch leak occurs when water enters through failed gaskets, corroded flashing, or loose fasteners. Pinpointing the exact entry point is critical before you seal roof hatch properly.
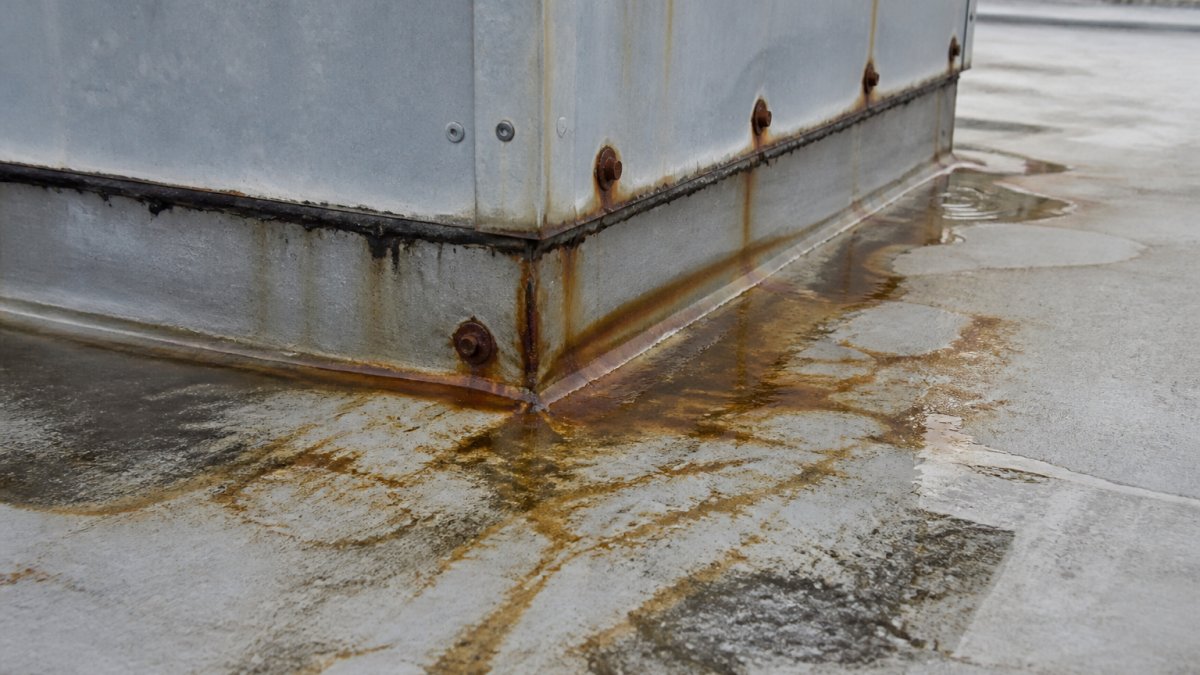
Inspect the hatch during or after rain and mark where water appears inside. Then trace backward from the roof, water often travels along the surface before entering, so the leak may be feet away from the drip location.
Roof-Hatch-Specific Leak Diagnosis
Roof hatches have multiple failure points: the gasket seal, fasteners, flashing, and frame. Each requires a different repair approach.
Check the rubber gasket first. If it feels hard or cracked, it has failed. White residue or mineral deposits signal prolonged water flow.
Inspect fasteners for corrosion and missing bolts, corroded fasteners create gaps where water pools and enters.
Examine the roof surface for cracks, blistering, debris, standing water, and gaps between the hatch frame and roof.
Distinguishing Failed Flashing from a Failed Hatch Gasket
Flashing is the metal or membrane barrier between the hatch frame and roof; the gasket is the rubber seal inside the lid. They fail differently and require different fixes.
A failed gasket shows: water dripping from the lid when opened, hard or brittle texture, water appearing inside after rain concentrated around the opening, or visible cracks.
A failed flashing shows: water on the roof surface around the frame, corrosion or rust, leaks in walls or ceilings near the hatch, or gaps and lifting edges.
Preparing and Drying the Roof Surface
You cannot seal a roof hatch to a wet or dirty surface, water and dirt prevent bonding. The surface must be clean and completely dry.
Clear debris, leaves, dirt, and standing water from the roof area. Sweep thoroughly, paying special attention to the groove where the hatch frame meets the roof.
Dry the surface completely, allow 4-6 hours in sun or 8-12 hours on overcast days. Moisture trapped under sealant causes failure within months.
For stubborn wet spots, use a clean cloth or compressed air. Wipe the hatch frame and surrounding surface until completely dry to the touch.
If algae, mold, or heavy dirt is present, clean with a stiff brush and water-based cleaner, rinse thoroughly, and dry completely.
Roof Hatch Flashing Installation and Sealing
Flashing is the critical barrier between roof and hatch frame. Proper installation and sealing prevents water from reaching the gasket.
Flashing should sit flat against the roof, extending 2-4 inches outward on all sides to catch water and direct it away from the hatch opening.
Remove old flashing by unbolting the hatch frame from the roof, then peel away old flashing and sealant.
Clean the roof surface with a wire brush to remove rust and debris, then wipe dry.
Position the new flashing flat against the roof with the hatch frame centered and edges overlapping evenly on all sides.
Apply a continuous bead of roof sealant around the underside of the flashing.
Press the flashing firmly onto the roof. Use a roller or your hand to press out air bubbles.
Allow the sealant to cure for the time specified by the manufacturer. Most sealants cure in 24-48 hours.
Roof Hatch Gasket Replacement Process
The gasket is the rubber seal that runs around the inside perimeter of the hatch lid. A failed gasket is one of the most common reasons roof hatches leak.
Replacing the gasket is straightforward and takes about 30 minutes. You'll need:
- A replacement gasket (order the exact model for your hatch)
- A scraper or putty knife
- Rubbing alcohol or mild cleaner
- A clean cloth
Open the hatch fully. Locate the gasket around the inside edge of the lid. It's typically a rubber cord or foam strip glued into a groove.
Use a scraper to carefully pry the old gasket out. Work slowly to avoid damaging the groove itself. Remove all old gasket material and dried adhesive.
Clean the groove with rubbing alcohol and a cloth. Allow it to dry completely. This removes any remaining adhesive and ensures the new gasket bonds properly.
Measure the groove depth and width. The new gasket must fit snugly. Order a replacement gasket that matches your hatch model exactly.
Apply a thin bead of adhesive to the groove. Most gaskets come with adhesive strips or you can use a flexible construction adhesive.
Close the hatch carefully. The gasket will compress slightly as the lid closes. Allow the adhesive to cure for 24 hours before opening the hatch again.
Choosing the Right Roof Sealant and Patching Products
The sealant you choose determines how long your repair lasts. Different roof types and climates require different sealants. Using the wrong product will result in premature failure.
The most common roof sealants are:
Roofing cement is a thick, putty-like material. It works well for patching small holes and sealing around fasteners. It's easy to apply but less flexible than liquid sealants. Use it for cracks smaller than 1/4 inch.
Liquid rubber sealants are flexible and adhere well to most roof surfaces. They cure to a rubber-like consistency and move with the roof as it expands and contracts. These work best for sealing seams and around hatch frames.
Rubberized coatings are thicker than liquid sealants and provide a protective layer over the entire repair area. They're ideal for larger areas or when you want to seal and protect the roof surface at the same time.
Modified bitumen sealants are sticky, tar-based products. They work well on flat roofs and adhere strongly to metal and asphalt surfaces. They're less flexible than rubber sealants.
Sealant and Material Compatibility
Not all sealants work on all roof surfaces. Metal roofs, asphalt shingles, and flat roofing membranes each have specific requirements.
For metal roof hatches, use sealants rated for metal-to-metal bonding. Liquid rubber or modified bitumen work well. Avoid cheap silicone sealants, they don't adhere well to metal and fail quickly.
For flat roofs with asphalt or modified bitumen membranes, use sealants compatible with those materials. Check the product label. Many liquid rubber sealants are compatible with asphalt, but some aren't.
For rubber roof membranes (EPDM or TPO), verify the sealant is compatible before applying. Some sealants can degrade rubber membranes. Most manufacturers provide compatibility charts on their websites.
Always check the temperature range where the sealant can be applied. Most sealants require temperatures between 40°F and 85°F during application and curing. Applying sealant in freezing temperatures or extreme heat will result in failure.
Roof Hatch Leak Repair: Applying Roofing Cement and Liquid Sealants
Proper application technique determines whether your repair lasts one year or ten years. Rushing this step is a common mistake that leads to early failure.
For roofing cement, use a putty knife or caulking gun. Apply a generous bead into the crack or around the fastener. Work the cement into the gap with your knife, pressing it firmly.
For liquid sealants, use a caulking gun. Apply a continuous bead along the seam or around the hatch frame perimeter.
Press the sealant into place with a wet finger or tool. This helps it bond to the surface and creates a smooth finish. Wipe away excess with a clean cloth before it dries.
Allow adequate curing time. Most liquid sealants require 24-48 hours. Some require longer. Check the label and don't expose the repair to water during curing.
For larger areas, apply sealant in multiple thin layers rather than one thick layer. This ensures better curing and more reliable adhesion.
Roof Hatch Maintenance Checklist and Post-Repair Verification
After you seal roof hatch, verify the repair works before you consider the job complete. Then establish a maintenance routine to prevent future leaks.
Post-repair verification:
- Wait 48 hours for sealant to cure
- Inspect the hatch opening from inside the building (no water should be visible)
- Check the roof surface around the hatch for any sealant gaps or cracks
- Open and close the hatch several times to ensure gasket seals properly
- Monitor the area after the next rain to confirm no leaks appear
Maintenance schedule:
| Task | Frequency | Time Required |
|---|---|---|
| Visual inspection of hatch and gasket | Every 6 months | 10 minutes |
| Clean debris and check for water pooling | Every 3 months | 15 minutes |
| Inspect fasteners for corrosion | Annually | 10 minutes |
| Replace gasket if cracked or hardened | Every 5-7 years | 30 minutes |
| Reapply sealant around flashing | Every 3-5 years | 45 minutes |
Preventive maintenance catches small problems before they become expensive water damage. A gasket replacement costs under $100 and takes 30 minutes. Water damage inside a building costs thousands and disrupts operations.
Safety Considerations and When to Hire a Professional
Working on a roof carries real risks. Know your limits and call a professional when the job requires it.
Hire a professional if:
- The hatch is more than one story above ground
- You're uncomfortable working at heights
- The roof surface is damaged or unstable
- The flashing needs to be removed and reinstalled
- The hatch frame is corroded or structurally compromised
- Local building codes require a licensed contractor for roof work
Safety rules if you do the work yourself:
- Use a fall arrest harness rated for roof work
- Wear non-slip shoes with good traction
- Never work on a wet or icy roof
- Have someone nearby who can call for help if needed
- Avoid working alone on any roof
- Check weather forecasts, don't work if rain is expected within 24 hours
- Use stable ladders and secure them properly
Victory Construction Products stocks roof hatches from trusted manufacturers like Bilco, Acudor, Dur-Red, and Elmdor. With same-day shipping on most in-stock orders and 27 years of industry experience, we make it simple to complete your repair on schedule.

Frequently Asked Questions
How do you seal a roof hatch to prevent leaks?
Sealing a roof hatch involves four key steps: identify the leak source (flashing, gasket, or seams), clean and dry the roof surface thoroughly, replace the gasket if damaged, and apply roofing cement or liquid rubber sealant around all seams and fasteners. Use a compatible sealant for your roof material, bitumen-based products for asphalt roofs, or polyurethane for metal roofs. Allow proper curing time before exposure to water.
When should a leaking roof hatch be repaired or replaced?
Repair the hatch if the gasket is degraded, fasteners are loose, or flashing is damaged. Replace the entire unit if the curb is corroded, the frame is warped, or multiple seals have failed. A quality roof hatch like those from Bilco or Acudor can last 15-20 years with proper maintenance. If your current hatch is over 15 years old and leaking, replacement may be more cost-effective than repeated repairs.
Should you use roofing sealant or flashing tape around a roof hatch?
Both serve different purposes. Roofing cement and liquid sealants create a waterproof bond and fill gaps in seams; they're ideal for sealing around fasteners and existing roof surfaces. Flashing tape provides temporary protection and works well for small leaks or as a secondary seal. For permanent roof hatch leak repair, roofing sealant is the preferred choice. Use flashing tape as a supplementary measure only.
How do you replace a roof hatch gasket?
Remove the hatch lid and inspect the existing gasket for cracks or compression. Clean the gasket channel thoroughly of debris and old sealant. Install a new rubber gasket of the same dimensions, ensuring it sits evenly in the channel. Allow the sealant to cure per manufacturer instructions before operating the hatch.
Roof hatch leaks are preventable with proper maintenance and timely repairs. Small gasket replacements and regular sealant checks keep water out and protect your building. When you need quality roof hatch products and fast delivery, Victory Construction Products has the inventory and expertise to keep your projects moving.