
Table of Contents
- What You Need Before Installing Commercial Roof Hatches
- Step-by-Step: How to Install Commercial Roof Hatches
- Roof Hatch Flashing Details: Waterproofing the Opening
- OSHA Roof Hatch Safety Requirements You Must Meet
- Roof Hatch Safety Railing Installation
- Commercial Roof Hatch Installation Cost Breakdown
- Troubleshooting Common Installation Errors
- Conclusion
Last Updated: August 23, 2026
Installing commercial roof hatches correctly is critical: water infiltration, failed inspections, and OSHA citations are the cost of getting it wrong. At Victory Construction Products, we've supplied commercial roof hatches to general contractors and facility managers across the country for over 27 years. This guide covers every stage of the process, from pre-installation planning through flashing, safety compliance, and troubleshooting, so your crew gets it right the first time.
The core principle: a commercial roof hatch is only as good as its curb, its flashing, and its fastening to the roof deck.

What You Need Before Installing Commercial Roof Hatches
Preparation separates a clean installation from a costly callback. Before any cutting starts, verify structural support, confirm your opening dimensions against the submittal drawing, and stage every tool and material on the roof.
Tools and Materials Checklist
Tools required:
- Reciprocating saw or circular saw with roofing blade
- Drill/driver with appropriate bits for fastener type
- Chalk line and tape measure
- Level (4-foot minimum)
- Caulk gun
- Pry bar and hammer
- Safety harness, anchor point, and lanyard
Materials required:
- Hatch unit with manufacturer installation manual
- Pressure-treated lumber or steel framing for curb reinforcement (new construction)
- Roofing membrane-compatible flashing tape
- Compatible sealant (check membrane type: TPO, EPDM, modified bitumen)
- Anchor bolts or structural screws rated for the load
- Compression spring or torsion bar hardware (typically supplied with the unit)
- Gasket seal material if not factory-applied
Confirm the hatch model number against the submittal drawing before ordering. Many project delays trace back to a unit arriving on site that doesn't match the approved spec.
Retrofitting vs. New Construction: Key Differences
Retrofitting a commercial roof hatch into an existing roof differs significantly from installing one during new construction.

In new construction, the roof deck framing is designed to accommodate the hatch opening. Structural support members are placed during rough framing, the curb is integrated before roofing material goes down, and the building envelope is sealed around the hatch as part of the original waterproofing sequence.
Retrofitting means cutting into a completed roof assembly. You must verify that the proposed opening location doesn't fall across a structural joist or rafter without adequate doubling. The existing roof membrane needs to be carefully cut back so it can be properly integrated with new flashing. Per the International Building Code structural requirements, any penetration through a load-bearing roof assembly requires documented structural support.
Budget an extra half-day for a retrofit compared to new construction, and don't skip the structural verification step.
Step-by-Step: How to Install Commercial Roof Hatches
The installation sequence follows a fixed logic: mark the opening, frame the curb, set the unit, then test operation. Skipping steps or reversing the order creates expensive problems.
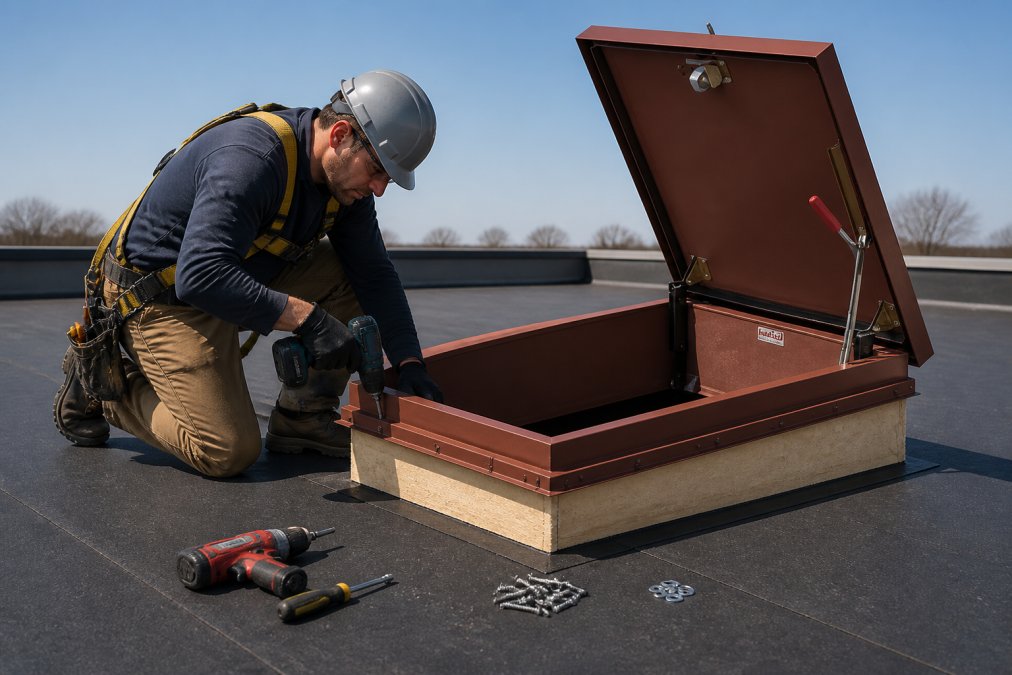
Step 1: Mark and Cut the Roof Opening
Transfer the opening dimensions from the submittal drawing to the roof deck using a chalk line, confirming the opening is square. Most commercial roof hatches specify a rough opening slightly larger than the hatch frame to allow for curb flange overlap; check the manufacturer installation manual for exact clearance.
Before cutting, verify that no mechanical, electrical, or structural elements exist directly beneath the proposed opening. Cut through the roofing membrane and deck material with a reciprocating saw, working carefully at corners to avoid overcuts. Remove the cut section and clean up any rough or splintered deck material.
Step 2: Frame the Curb and Secure to the Roof Deck
The roof curb is the structural base the hatch sits on and must be level, square, and positively fastened to the deck. A shifting curb will break the gasket seal and allow water infiltration within freeze-thaw cycles.
Install doubled headers at the head and foot of the opening to carry the load around the penetration. For wood-framed decks, use pressure-treated lumber sized to match the existing joist depth. For steel decks, follow the manufacturer's steel framing specifications.
Set the curb into the opening with the curb flange sitting flat on the roof surface. Check for level in both directions. Fasten through the curb flange into the structural support using anchor bolts or structural screws at the spacing specified in the installation manual, typically every 12 inches around the perimeter.
Step 3: Set the Hatch Unit and Fasten the Curb Flange
With the curb secured and level, lower the hatch unit onto the curb. Most commercial units are designed so the hatch cover assembly drops directly onto the curb and is fastened through the curb flange from above.
Apply a continuous bead of compatible sealant under the curb flange before final fastening. Fasten the curb flange to the curb using the hardware specified in the installation manual, working in a cross pattern to ensure even gasket compression.
Check alignment: the hatch cover should sit parallel to the curb frame with consistent gap on all sides. Misalignment indicates the curb isn't perfectly square and must be corrected before proceeding.
Step 4: Test the Hinge Mechanism and Compression Spring
Test the hatch operation fully before completing installation. Open the cover to the fully open position and verify that the compression spring or torsion bar holds it open without assistance. The hinge mechanism should move smoothly without binding.
Test the latching devices from both inside and outside. The inside handle must allow egress without a key or special tool, per life safety code requirements. Confirm the gasket seal compresses evenly when the cover is closed, with no visible gaps around the perimeter.
Roof Hatch Flashing Details: Waterproofing the Opening
Waterproofing is where most commercial roof hatch installations either succeed or fail long-term. The flashing detail is the most consequential part of the job.
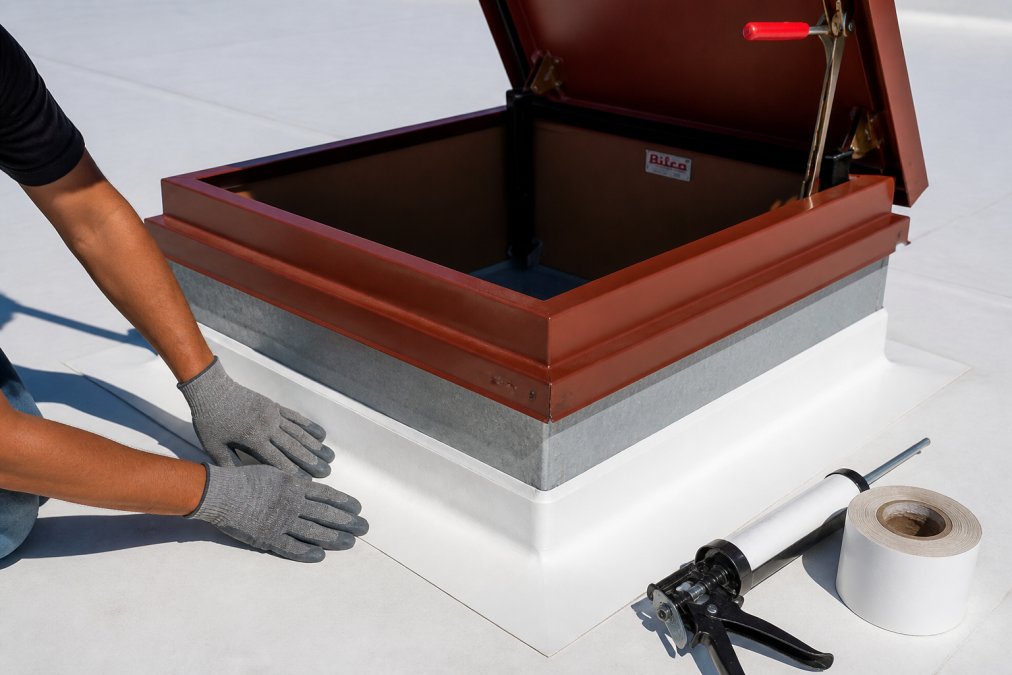
The flashing sequence must be compatible with your existing roof membrane. TPO, EPDM, and modified bitumen each require specific flashing products and adhesion methods. Using an incompatible sealant on a TPO membrane will cause delamination within a season. Per NRCA roofing installation guidelines, proper membrane-to-flashing compatibility is the most common source of premature roof penetration failures.
The standard sequence for a commercial roof hatch flashing detail:
- Clean and prime the membrane surface around the curb base (minimum 6-inch perimeter)
- Apply flashing tape from the curb flange onto the membrane, working uphill first, then the sides, then the downhill edge last
- Apply a second bead of compatible sealant over the flashing tape edge
- Install counter-flashing or pitch pockets if required by the roof pitch or membrane system
- Inspect all seams for voids or lifted edges before considering the installation complete
The curb flange should lap over the membrane, not under it. Water runs downhill; the flashing detail must direct it away from the opening, not toward it.
OSHA Roof Hatch Safety Requirements You Must Meet
OSHA roof hatch safety requirements are not optional. The key standard governing fall protection at roof hatch openings is OSHA 29 CFR 1926.502 fall protection systems, which applies to any opening where a worker could fall 6 feet or more.
The specific requirements that apply to commercial roof hatches:
- Any roof hatch opening must be guarded when open during work operations
- Covers used to close openings must be capable of supporting twice the maximum intended load
- Covers must be secured against accidental displacement
- When a hatch is open and workers are present, a safety railing or equivalent fall protection system must be in place
Verify that the unit you're installing meets or exceeds the load-bearing requirements for your application. Manufacturers publish load ratings in their submittal documentation.
Roof Hatch Safety Railing Installation
Roof hatch safety railing installation is a separate scope item from the hatch itself but is required on most commercial projects and should be planned before the hatch ships.
A safety railing at a roof hatch access point prevents falls through the open hatch and provides a handhold for workers ascending and descending the ladder. Most commercial railing systems designed for roof hatch applications attach directly to the hatch curb or the surrounding roof deck.
The standard configuration for roof hatch safety railing installation:
- Select a railing system rated for the hatch model and curb dimensions (confirm compatibility with the hatch manufacturer)
- Attach the railing base plates to the curb or deck using the specified anchor bolts
- Verify that the railing height meets the 42-inch top rail requirement under OSHA 29 CFR 1926.502
- Confirm that the railing system does not obstruct the hatch cover's full open position or the hinge mechanism
- Test the railing for rigidity: it must withstand a 200-pound outward force at the top rail without deflecting more than 3 inches
Some hatch manufacturers offer integrated railing systems designed specifically for their units, which are worth specifying upfront because field-fabricated railing attachments frequently create conflicts with hatch cover operation.
Commercial Roof Hatch Installation Cost Breakdown
Commercial roof hatch installation cost varies based on the unit selected, the complexity of the installation, and whether the project is new construction or a retrofit.
| Cost Component | Typical Range | Notes |
|---|---|---|
| Hatch unit (galvanized steel) | Starting from $1,340 | Elmdor, Milcor, Acudor options available |
| Hatch unit (premium/Bilco) | Starting from $1,480 | One-hand operation, multiple material options |
| Labor (new construction) | 4-6 hours, 2-person crew | Curb framing included |
| Labor (retrofit) | 6-10 hours, 2-person crew | Structural verification and membrane work |
| Flashing materials | Varies by membrane type | TPO and EPDM systems cost more |
| Safety railing system | Separate line item | Required on most commercial projects |
| Permit and inspection | Varies by jurisdiction | Budget for retrofit projects |
Victory Construction Products carries hatch units from Bilco, Acudor, Elmdor, Milcor, and other trusted brands, with pricing starting at $1,340 for galvanized steel options. The Bilco Roof Hatch starts at $1,480 and includes one-hand operation designed so the installer keeps one hand on the ladder at all times. The Acudor Roof Hatch starts at $1,347, available in prime-coated galvanized steel or aluminum.

The biggest variable in total project cost is labor on retrofit installations. Structural verification, careful membrane cutting, and proper flashing integration add hours that new construction doesn't require.
Troubleshooting Common Installation Errors
Most commercial roof hatch failures trace back to a small set of repeatable mistakes.
Curb not level. A curb that's even slightly out of level causes uneven gasket compression, leading to water infiltration at the low corner. Check level in both directions before final fastening, and shim if necessary.
Incompatible sealant. Using general-purpose caulk on a TPO or EPDM membrane will fail. Always match the sealant to the membrane system.
Flashing installed in wrong sequence. Installing the downhill flashing before the side flashings traps water at the corners. Always work uphill first.
Compression spring undertensioned. A cover that doesn't hold fully open is a pinch and crush hazard. Adjust tension per the manufacturer's instructions before the installation is complete.
Fasteners undersized or under-torqued. Use the fastener type and size specified in the installation manual, and torque to spec. Undersized fasteners are a structural failure waiting to happen.
Missing or misaligned gasket seal. The factory-applied gasket seal must sit in full contact with the curb frame when the cover is closed. If the gasket is pinched, twisted, or missing at any point, water infiltration will follow.
On retrofit projects, skipping the permit process to save time creates far more delay than the original permit would have. For projects involving multiple properties, Victory Construction Products can provide submittal drawings and model documentation directly through our online system, which simplifies the permit application process across multiple sites.
Getting commercial roof hatch installation right requires attention at every stage: structural framing, weatherproofing, OSHA compliance, and operational testing. Victory Construction Products stocks hatch units from Bilco, Acudor, Elmdor, Milcor, and other leading brands, with same-day shipping on most in-stock orders and a lowest-price guarantee. Access submittal drawings, model numbers, and pricing directly from our site. Add to cart and keep your project on schedule.
Frequently Asked Questions
What are the OSHA requirements for roof hatch installation?
OSHA 29 CFR 1910.23 requires that any roof hatch opening present a fall hazard be protected by a self-closing cover, a safety railing, or both. The hatch cover must support at least twice the maximum intended load. When the hatch is open and workers are present, a guardrail system meeting OSHA 1910.29 standards must prevent falls.
How much does it cost to install a commercial roof access hatch?
The hatch unit itself typically starts around $1,340 to $1,480 depending on the model and material, galvanized steel, aluminum, or stainless steel. Labor for a straightforward installation on a flat commercial roof generally runs between $300 and $800, depending on roof type and local rates. Retrofitting an existing roof adds cost for structural reinforcement and flashing work. A complete installed cost of $1,800 to $3,000 is a reasonable working range for most commercial projects.
How do you ensure a roof hatch is properly flashed and watertight?
Proper waterproofing depends on integrating the curb flange with the existing roof membrane or roofing material. On membrane roofs, the flashing should lap up and over the curb a minimum of 8 inches and be secured with compatible adhesive and sealant. On metal roofs, step flashing and counter-flashing are required. A closed-cell rubber gasket seal between the hatch cover and curb frame is the final barrier against water infiltration. Inspect all seams after installation and re-check after the first heavy rain.
Do you need a structural engineer to install a roof hatch?
Most standard commercial roof hatch installations on concrete or steel roof decks do not require a structural engineer if the opening dimensions fall within the load-bearing capacity of the existing framing. However, retrofitting a hatch into an existing roof, especially on wood-framed or older structures, may require an engineer to confirm the roof deck can handle the new opening and the added load. Always check local building codes and pull the required permit before cutting into any roof structure.
This article was written using GrandRanker