
Table of Contents
- Tools and Safety Equipment Required for Access Door Installation
- Measuring the Opening and Wall Thickness
- How to Frame an Access Door Opening
- Cutting the Wall Material and Preparing the Rough Opening
- Inserting and Positioning the Access Door Frame
- Fire-Rated Access Door Installation Requirements
- Securing the Frame, Applying Finish Trim, and Final Inspection
- Conclusion
Last Updated: August 30, 2026
Tools and Safety Equipment Required for Access Door Installation
Installing a commercial access door requires specific tools and safety precautions. Gather everything on site before beginning, rushing to find tools mid-project wastes time and creates safety risks.
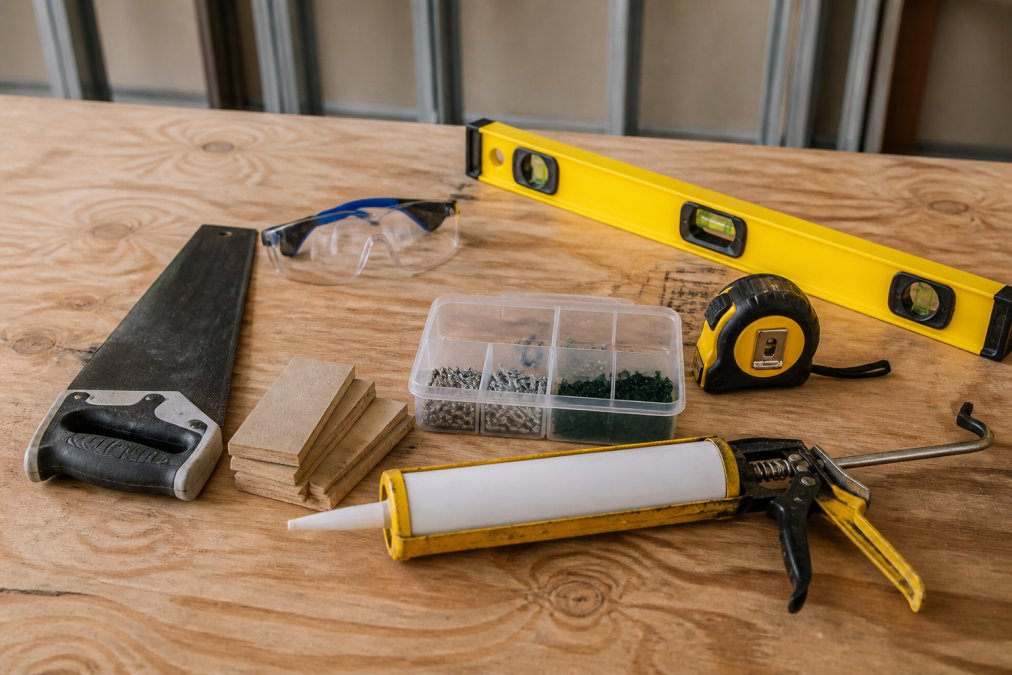
Your essential toolkit includes a drywall saw or reciprocating saw for cutting wall material, a tape measure for precise measurements, a level for frame alignment, a screwdriver set, and a stud finder to locate framing. You'll also need shims for leveling, fasteners appropriate to your wall type, and a caulk gun with sealant for sealing gaps.
Safety equipment is non-negotiable. Wear safety goggles to protect your eyes from dust and debris, work gloves to protect against sharp edges, and a dust mask or respirator when cutting drywall or masonry. For ceiling installations, use a sturdy ladder or scaffolding rated for your weight plus tools.
Have your installation manual and manufacturer's technical drawings available on site. These documents clarify specific requirements for your access door model and prevent code compliance issues.
Measuring the Opening and Wall Thickness
Accurate measurements determine installation success. Incorrect dimensions lead to gaps, misalignment, or doors that won't close properly.
Consult the manufacturer's submittal documentation for exact opening dimensions. These account for the frame, flange, and clearance needed for proper operation. Measure wall thickness at multiple points, standard drywall construction typically measures 4.5 to 6 inches, while masonry walls vary significantly.
Mark the opening location clearly on both sides of the wall using pencil or chalk. For ceiling installations, mark from above and below to verify alignment. Check for obstructions within the marked area, electrical outlets, plumbing, and HVAC ducts sometimes occupy needed space. Relocating utilities adds time and cost, so confirm the location is clear before proceeding.
How to Frame an Access Door Opening
Proper framing creates structural support for the access door frame. The frame must sit securely on solid support, not drywall alone.
For stud wall installations, the rough opening sits between existing studs or requires new studs for framing. If the opening spans across studs, install a header above the opening to support the wall above. Most access door openings are small enough that a simple 2x4 header suffices (iccsafe.org). Install vertical trimmer studs on each side of the opening and fasten the header using nails or bolts appropriate to your framing material.
For masonry installations, you're preparing the masonry opening to accept the access door frame. Remove any loose mortar, brick fragments, or debris from the opening perimeter. The frame will seat against the masonry surface, so irregularities affect how securely the frame sits.
Cutting the Wall Material and Preparing the Rough Opening
Verify measurements one final time before cutting. Use a drywall saw for drywall surfaces or a reciprocating saw for thicker materials. For masonry, use a masonry saw or angle grinder with a masonry blade.
Mark cutting lines clearly using a straightedge and pencil. For drywall, score the surface first with a utility knife, then use the drywall saw to cut through. For masonry, wear a respirator and eye protection, as cutting generates substantial dust.
After cutting, clean the opening thoroughly. Remove all drywall dust, brick fragments, mortar debris, and loose material. A clean opening allows the frame to seat properly. Inspect opening edges for damage or irregularities. Drywall edges should be relatively clean and straight; masonry edges should have no loose mortar or protruding brick. Sand rough spots smooth to prevent the frame from catching or rocking during installation.
Inserting and Positioning the Access Door Frame
Insert the access door frame carefully into the prepared opening. Lift the frame and position it so the flange sits evenly around the perimeter with equal clearance on all sides. Use shims to adjust the frame position vertically and horizontally.
Check the frame for plumb using a level placed against vertical edges. Adjust shims until the frame is perfectly vertical. Check for level along the top and bottom edges. The frame must be square, measure diagonally from corner to corner; both measurements should be identical.
Once positioned correctly, secure the frame temporarily with fasteners. Don't fully tighten yet; you want to make minor adjustments if needed. Install fasteners through the flange into surrounding wall material or framing studs.
Fire-Rated Access Door Installation Requirements
Fire-rated access doors must be installed according to specific requirements outlined in building codes and manufacturer documentation. These requirements exist because improper installation compromises the fire rating.
Building codes specify which areas require fire-rated access doors. Walls separating different fire zones, walls around stairwells, and walls separating tenant spaces typically require fire-rated doors. The fire rating is expressed as a time period, such as 1-hour or 2-hour, indicating how long the assembly resists fire spread (nfpa.org).
The entire assembly, frame, door panel, fasteners, and sealant, must meet the fire rating. A single component that doesn't meet the rating compromises the entire assembly. Install fire-rated sealant around the frame perimeter according to manufacturer specifications. This sealant prevents flames and smoke from spreading through gaps. Apply sealant continuously around the entire perimeter.
For fire-rated installations, gaskets or fire-rated weatherstripping seal the gap between the door panel and frame. These components must remain intact to maintain the fire rating. According to the International Building Code requirements for fire-rated assemblies, all penetrations through fire-rated walls must be sealed to maintain the assembly rating.
Document the fire-rated installation with photographs and keep manufacturer submittal documentation on file. This documentation proves the installation meets code requirements if inspectors question compliance later.
Securing the Frame, Applying Finish Trim, and Final Inspection
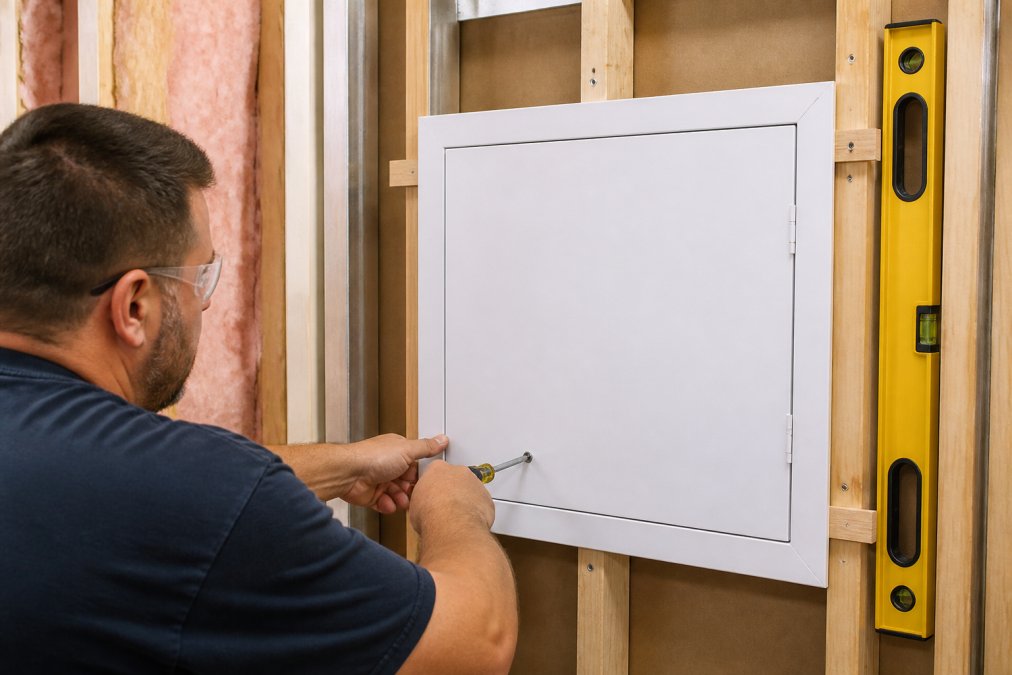
Once the frame is positioned and verified for plumb and level, secure it permanently. Install fasteners through the frame flange into surrounding wall material or studs, spacing them according to manufacturer specifications, typically every 6 to 8 inches around the perimeter.
Use fasteners appropriate to your wall type. For drywall, use heavy-duty drywall screws or anchors. For masonry, use masonry anchors or fasteners rated for the specific masonry type. For wood studs, use wood screws or bolts. Tighten fasteners firmly but don't over-tighten, which can strip threads or crack the frame. Check frame alignment once more after tightening all fasteners.
Apply finish trim around the frame perimeter to cover gaps between the frame and wall material. Trim options include vinyl, metal, or painted wood trim depending on aesthetic requirements. Before installing trim, apply sealant around the frame if not already done. Use paintable sealant if the trim will be painted. Allow sealant to cure according to manufacturer specifications before applying trim.
Install trim pieces around the frame perimeter, securing them with fasteners appropriate to the trim material. Trim should sit flush against the frame and wall surface with no gaps. Caulk any remaining gaps after trim installation.
Test the access door operation before considering the installation complete. The door should open and close smoothly without binding. The latch mechanism should engage securely. Conduct a final inspection verifying all fasteners are tight, sealant is applied and cured, trim is secure, and the door operates properly. Confirm the frame is plumb, level, and square, and that the installation meets any fire-rating or acoustic requirements.
Document the completed installation with photographs. Keep manufacturer submittal documentation, installation manual, and technical drawings with project records.
Conclusion
Installing a commercial access door correctly requires planning, precision, and attention to detail. The steps outlined in this guide create a foundation for reliable, code-compliant installations that serve your facility for years.
Victory Construction Products stocks a complete range of access doors from trusted manufacturers like JL Industries, Milcor, Elmdor, and Acudor. With same-day shipping on most in-stock orders and a lowest-price guarantee, we ensure your projects stay on schedule. Get started with Victory Construction Products today and access the professional-grade hardware your commercial projects demand.


Frequently Asked Questions
What are the OSHA requirements for commercial access door installation?
OSHA does not specify a single standard for access door installation, but requires that all openings provide safe access to building systems and meet structural integrity standards. Your installation must comply with the International Building Code (IBC), which mandates that access doors be properly secured, sized according to the equipment they serve, and installed so they do not create fall hazards or obstruct emergency egress. Fire-rated doors must meet NFPA 80 standards. Always verify local building codes, as jurisdictions may have stricter requirements than federal standards.
What is the difference between fire-rated and non-fire-rated access door installation?
Fire-rated access doors must be installed in fire-rated walls and ceilings, using fire-rated frames, gaskets, and sealants that maintain the fire rating of the wall assembly. Non-fire-rated doors are used in non-fire-rated walls and do not require specialized sealants or thermal protection. Fire-rated installations demand stricter attention to clearance, gasket placement, and submittal documentation to verify compliance with building codes. The installation process is similar, but fire-rated assemblies require additional inspection and testing to confirm the integrity of the fire barrier.
How do you ensure a flush finish when installing an access panel in drywall?
Measure the rough opening precisely to match the access door's flange dimensions. Use shims to keep the frame perfectly level and square before fastening. The drywall flange should sit flush against the wall surface with no gaps. After securing the frame, apply joint compound around the flange edges, sand smooth, and paint to match the wall. Products like the Acudor UF-5000 feature a one-piece trim flange that resists racking and sagging, making flush installation easier and more reliable.
Do commercial access doors require specific wall backing or support?
Yes. Access doors must be installed over solid wall backing, typically wood or metal studs spaced 16 inches on center. The backing provides structural support for the fasteners and ensures the frame remains rigid under load. For ceiling installations, backing must be installed between joists. If installing in masonry, use masonry anchors appropriate to the wall type. Always verify that the wall or ceiling assembly can support the weight of the door panel and the forces applied during opening and closing.
What happens if my access door installation doesn't meet building code?
Code violations can delay project completion, trigger reinspection requirements, and create liability issues. Non-compliant installations may fail fire safety testing, compromise HVAC or plumbing access, or create fall hazards. Building inspectors can require removal and reinstallation at your expense. To avoid this, obtain a copy of your local building code before installation, verify fire-rating requirements, use products from trusted manufacturers, and request submittals from your supplier to confirm compliance with your jurisdiction's standards.
Can I install an access door in a masonry wall?
Yes, but the process differs from drywall installation. You must use masonry anchors rated for the wall type (brick, concrete block, or solid concrete). Drill pilot holes and use fasteners that penetrate at least 1.5 inches into the masonry. The Elmdor DW is designed for masonry, tile, wood, and other wall surfaces. Ensure the masonry is solid and not deteriorating. Fire-rated installations in masonry require additional sealant to maintain the fire barrier integrity.
This article was written using GrandRanker