
Table of Contents
- Safety Precautions and PPE for Roof Hatch Replacement
- How to Measure for a Roof Hatch Replacement
- Roof Hatch Installation Tools List
- Assessing Structural Integrity Before Replacement
- Removing the Old Roof Hatch and Curb
- OSHA Roof Hatch Safety Requirements and Building Code Compliance
- Installing Your New Roof Hatch with Proper Waterproofing
- Final Adjustments and Maintenance Schedule
- Frequently Asked Questions
Last Updated: October 2, 2026
Safety Precautions and PPE for Roof Hatch Replacement
To replace roof hatch safely requires strict fall protection and safety protocols. Working at height means one mistake can be catastrophic. Understand OSHA requirements and necessary safety measures before starting.

Start with a safety harness rated for fall protection. Attach it to a secure anchor point before stepping onto the roof. Your anchor must support at least 5,000 pounds of force. If your roof doesn't have permanent anchor points, install a temporary one using a qualified contractor.
Required PPE: full-body safety harness with shock-absorbing lanyard, hard hat, steel-toed boots with slip-resistant soles, cut-resistant gloves, and eye protection.
Wet, icy, or graveled roofs are slippery hazards. Check weather before scheduling and avoid rain, high winds, or extreme heat.
Never work alone. A partner on the ground can hand tools, spot hazards, and call for help if needed.
How to Measure for a Roof Hatch Replacement
Accurate measurements prevent costly modifications and installation problems.
Measure the interior opening at three points (top, middle, bottom) since roofs settle unevenly. Record the smallest dimension in each direction.
Measure the curb's outer dimensions, height from roof surface to top edge, and material (steel, aluminum, or mix).
Inspect for rust, dents, or separation. Photograph from multiple angles to help with ordering replacements or determining if reinforcement is needed.
Use chalk line to outline the curb footprint and mark nearby obstacles (vents, pipes, conduits, beams) for proper alignment.
Measure distances from fixed reference points (roof edge, building corner, structural beam) to the hatch opening for accurate sourcing.
| Measurement | Purpose | Critical? |
|---|---|---|
| Interior opening width/depth | Confirms hatch size | Yes |
| Curb outer dimensions | Determines replacement curb fit | Yes |
| Curb height | Affects flashing installation | Yes |
| Distance to fixed points | Helps source correct replacement | Yes |
| Curb material | Informs material selection | Yes |
Document measurements and photos. Email to Victory Construction Products with specifications for confirmation of the exact model and size needed.
Roof Hatch Installation Tools List
Specialized equipment is required for safe, accurate installation. Missing critical tools can derail the project.
For removal: pry bar, reciprocating saw with metal-cutting blades, hammer, adjustable wrench set, screwdriver set, and caulk removal tool.
For installation: cordless drill-driver, torque wrench (critical for structural integrity), socket set, tape measure, carpenter's level, and chalk line.
For waterproofing: caulking gun, roofing cement or compatible sealant, brush or roller, flashing tape, and utility knife.
Rent tools you don't own. Home improvement centers rent by the day. Factor rental costs into your budget.
Having the right tools prevents damage to the roof membrane, ensures fasteners are tight enough (but not over-tightened), and speeds up the job significantly.
Assessing Structural Integrity Before Replacement
Confirm the roof structure can support the hatch. Damaged joists or rotted wood cannot safely hold the hatch frame, lid, and occupant weight.
Press exposed wood with a screwdriver. If the blade sinks in easily, the wood is compromised. Document findings with photos.
If you find rot, water damage, or cracking, consult a structural engineer.
For steel structures, check for corrosion. Light surface rust can be cleaned and primed. Deep pitting requires steel replacement or reinforcement.
Most roof hatches weigh 80-150 pounds. Undersized or damaged joists cannot support this load plus occupant weight. Refer to structural drawings if available.
Check the roof membrane for integrity. If cracked, torn, or deteriorating, repair or replace the affected section before installing the new hatch.
Removing the Old Roof Hatch and Curb
Removing the old hatch and curb is the messiest part. Old sealant, rust, and corrosion make everything stick.

Remove the hatch lid by unbolting the hinges.
Remove all fasteners holding the curb to the roof, typically bolts around the perimeter.
Use a pry bar to gently lift the curb, moving around the perimeter.
Inspect the roof deck. Remove old sealant, debris, and corrosion with a scraper or wire brush.
Dispose of the old curb and hatch at a scrap yard. Check local regulations for old roofing material disposal.
Clean the roof opening and smooth rough or corroded edges with a file or wire brush to prevent flashing puncture.
Measure the opening again to confirm measurements match your initial recording.
OSHA Roof Hatch Safety Requirements and Building Code Compliance
OSHA regulations govern roof hatch installation. Compliance is mandatory. Check local building codes for additional requirements.
OSHA requires fall protection for roof openings larger than 30 inches. Roof hatches typically require guardrails, safety nets, or personal fall arrest systems.
The lid must close securely and latch.
Gas springs and hold-open mechanisms must hold the lid in any position without dropping. Test regularly for reliable function.
Confirm the hatch is rated for the intended use. Check manufacturer specifications for load rating and frequency of use.
Guardrails must be at least 42 inches high, withstand 200-pound horizontal force, and have no openings larger than 30 inches.
Ladders must extend 3 feet above the hatch, be secured at the top, and angled at 75 degrees (4-to-1 ratio).
Check local building codes before starting. Some jurisdictions require permits, structural inspection, or engineer approval.
Document compliance with photographs and inspection records for future reference.
OSHA guidelines on fall protection in construction
Installing Your New Roof Hatch with Proper Waterproofing
This is where your measurements, preparation, and tools pay off when you replace roof hatch.
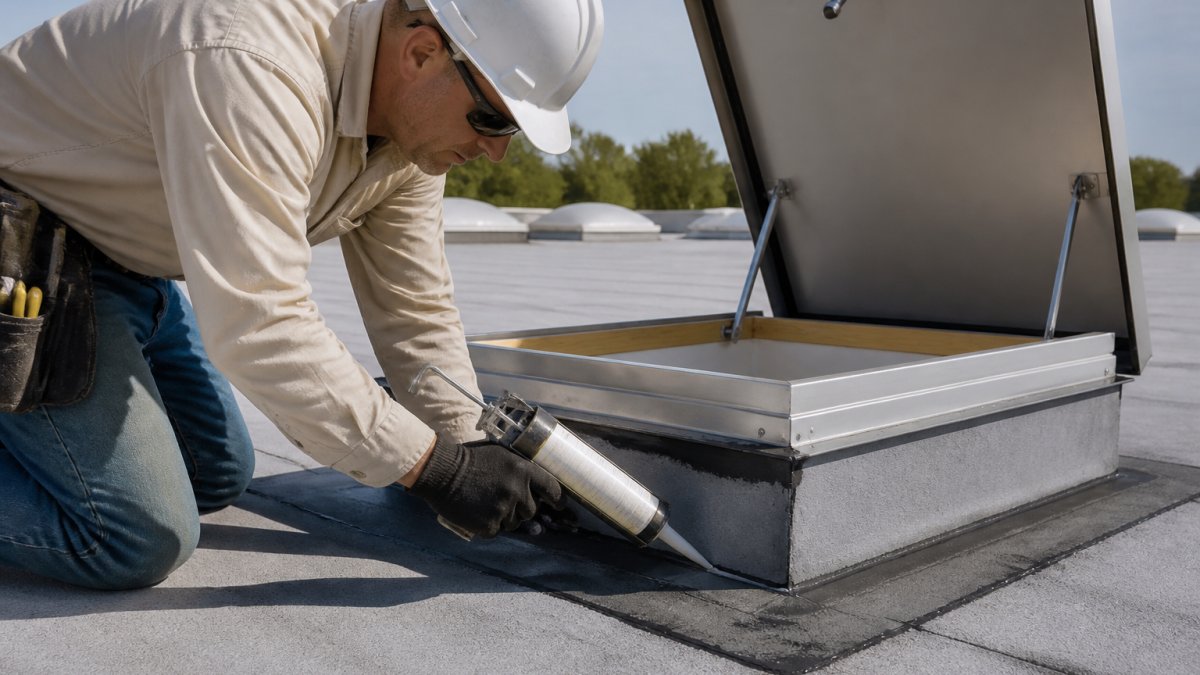
Position the new curb aligned with chalk marks.
Temporarily secure the curb with a few fasteners. Adjust alignment and ensure flashing fits before final fastening.
Install flashing to bridge the gap between curb and roof membrane.
Secure flashing with stainless steel or galvanized fasteners spaced every 6 inches.
Caulk the entire curb perimeter with compatible sealant (silicone, polyurethane, or modified bitumen).
Install the hatch lid and bolt to the frame using a torque wrench.
Test operation by opening and closing the lid multiple times. Verify smooth movement, secure latching, and hold-open arm function.
Inspect the seal for gaps or loose fasteners.
Victory Construction Products stocks roof hatches from trusted manufacturers like Bilco and Acudor. The Bilco Roof Hatch offers one-hand operation and is available in galvanized steel, aluminum, or stainless steel. The Bilco VersaMount Access Hatch is specifically designed for replacement installations and features a low-profile curb with built-in flashing. For budget-conscious projects, the Acudor Roof Hatch delivers durability at a lower price point.

Final Adjustments and Maintenance Schedule
After installation, the hatch needs fine-tuning and ongoing care to perform reliably for years.
Adjust the gas springs. Most roof hatches use gas springs to assist opening and closing.
Test hold-open arms. The hold-open arm must hold the lid securely in any position from fully open to partially open.
Check the latch catch. The latch must hold the lid firmly closed.
Inspect the seal. After the first rain, check for leaks inside the building. Look for water stains, drips, or moisture around the hatch opening.
Establish a maintenance schedule:
- Monthly: Inspect the hatch from the outside. Look for debris, standing water, or visible damage.
- Quarterly: Test the operation. Open and close the lid. Verify the latch and hold-open arm function smoothly.
- Annually: Clean the hatch thoroughly. Remove leaves, dirt, and debris. Inspect fasteners for corrosion. Reapply sealant to any areas where it has cracked or peeled.
- Every 2-3 years: Inspect the flashing and curb for rust or corrosion. Touch up any rust with paint. Replace corroded fasteners with stainless steel equivalents.
- Every 5 years: Have a professional inspect the roof membrane around the hatch. Check for signs of water intrusion or deterioration.
Keep detailed records. Document inspections, repairs, and maintenance. This history helps you spot trends (e.g., recurring leaks in one area) and plan future maintenance.
Building Code requirements for roof access and hatches
Replacing a roof hatch is a complex project that demands precision in measurement, structural assessment, waterproofing, and safety compliance.
Frequently Asked Questions
How do you measure an existing roof hatch for a replacement?
Measure the opening width and length at the widest points inside the curb frame. Check the curb height from the roof deck to the top of the curb. Record the hinge location and any mounting hardware positions. If the old curb is damaged, measure the roof opening itself. Use these dimensions to match a compatible replacement hatch or retrofit model that fits your existing opening without requiring complete re-roofing.
Is it necessary to replace the curb when replacing a roof hatch?
Not always. If your curb is structurally sound, free of rust or corrosion, and properly sealed, you can install a retrofit hatch directly onto the existing curb. The Bilco VersaMount Access Hatch is designed specifically for this, it sits on top of the old curb, saving time and re-roofing costs. However, replace the curb if it shows structural damage, severe weathering, or if the new hatch requires different mounting specifications.
What are the main OSHA requirements for roof hatch safety?
OSHA requires roof hatches to have a secure latch catch, proper fall protection when open, and safe operation that prevents accidental closure. Hatches must support the rated load without deflection, have gas springs or hold-open arms that hold the lid securely in the open position, and be installed according to manufacturer specifications. All fasteners must be corrosion-resistant, and the installation must comply with building codes for load-bearing and structural integrity.
How do I ensure a watertight seal when installing a new roof hatch?
Install flashing and counter-flashing that extend at least 6 inches onto the roof membrane. Apply a continuous bead of roof-rated sealant or caulking around the curb base before securing the hatch. Use the roof membrane manufacturer's recommended sealant type. After installation, inspect all seams, fastener holes, and the hinge mechanism for gaps. Test the seal during the first heavy rain to confirm no water penetration occurs around the curb or mounting points.