
Table of Contents
- Pre-Installation Measurements and Site Preparation
- Recessed Floor Door Installation Tools You'll Need
- How to Frame for a Floor Hatch: Step-by-Step
- Securing the Frame and Casting Into Concrete
- Waterproofing and Moisture Barrier Integration
- Hinge Adjustment, Latch Mechanism, and Load Testing
- Recessed Floor Door Maintenance Tips and Troubleshooting
- Common Installation Mistakes to Avoid
- Frequently Asked Questions
Last Updated: September 23, 2026
Installing recessed floor access doors requires precision, proper measurement, and attention to structural detail. Whether you're managing a commercial facility or overseeing a construction project, getting this installation right protects your building's integrity and keeps operations running smoothly. This guide from Victory Construction Products covers everything you need to know about how to install recessed floor access doors, from initial site prep through final load testing.
Pre-Installation Measurements and Site Preparation
Measure twice and verify three times before ordering materials. The opening dimensions determine whether your recessed floor access doors fit flush with the finished floor or sit proud of it.
Identify the exact location and mark the center point. Most floor hatches require 1/4 inch clearance around the frame perimeter. Check your manufacturer's specifications for exact tolerances.
Assess your subfloor condition for cracks, uneven surfaces, or moisture. Use a long straightedge to check for high spots or dips greater than 1/8 inch over 10 feet, as an unlevel subfloor affects installation and door sealing.
For finished floors, measure the finished floor height at multiple points around your opening location to ensure correct frame depth. Document these measurements to guide installation.
Take photos and note any utilities running beneath the floor. Call your local utility locating service before cutting to avoid hitting pipes or wires.
Recessed Floor Door Installation Tools You'll Need
Quality tools prevent costly downtime and safety issues.
Gather these essential items:
- Tape measure (at least 25 feet) for accurate dimensions
- Chalk line for marking the rough opening perimeter
- Circular saw or reciprocating saw for cutting through subfloor material
- Drill with bits for fasteners and pilot holes
- Level (at least 4 feet long) to check frame alignment
- Pry bar for removing subfloor sections
- Safety glasses and work gloves for all phases
- Caulk gun for sealing joints before casting concrete
- Adjustable wrench for tightening fasteners
- Concrete mixer or access to ready-mix concrete (for casting applications)
For existing finished floors, add a jigsaw or oscillating multi-tool to cut cleanly through vinyl tile or carpet without splintering.
For load-bearing applications, rent a load testing kit or calibrated weights to verify the hatch meets specification.
How to Frame for a Floor Hatch: Step-by-Step
Framing creates the structural foundation and determines whether the hatch operates smoothly.
Step 1: Cut the rough opening. Mark the perimeter with chalk line and cut perpendicular to the subfloor. Remove the section carefully to avoid damaging utilities.
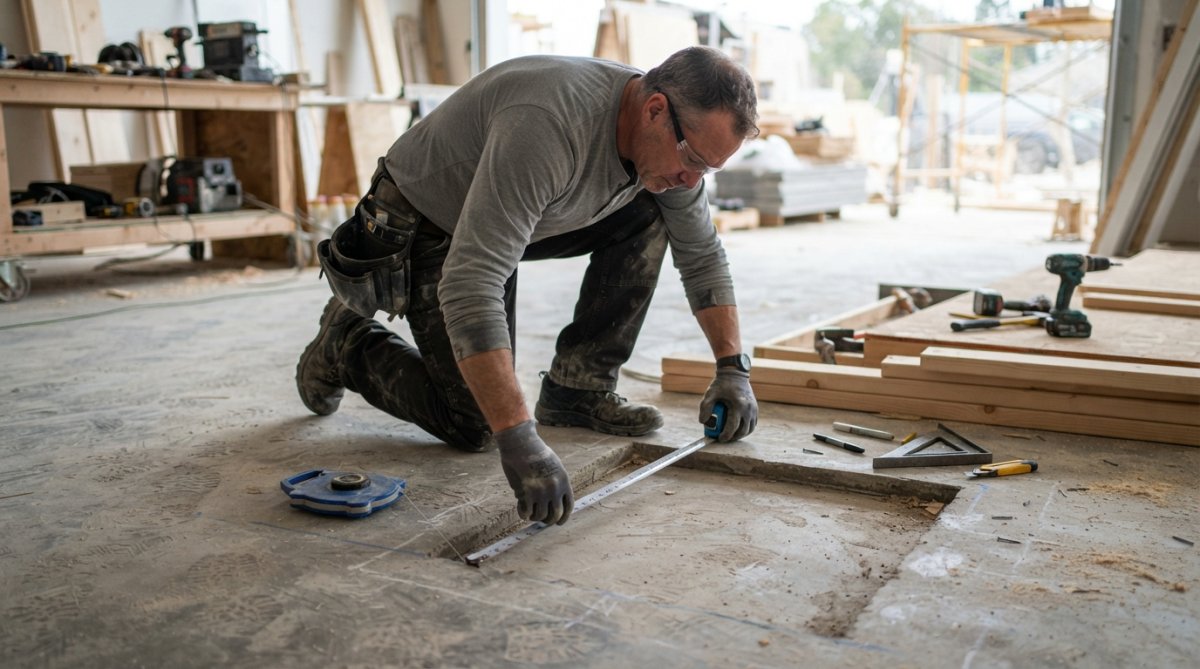
Step 2: Prepare the frame. Inspect for damage and measure diagonals to verify the frame is square. Frames out of square by more than 1/4 inch won't function properly.
Step 3: Position the frame in the opening. Lower the frame and use shims to level it in all directions, checking both axes.
Step 4: Secure the frame temporarily. Tack in place with fasteners or temporary bracing and verify level again.
Step 5: Install moisture barriers. Apply waterproofing sealant around the frame perimeter before casting concrete to prevent water infiltration.
Securing the Frame and Casting Into Concrete
Anchoring the frame into concrete creates a permanent, load-bearing installation suitable for new construction or ground-floor applications.
The frame's integral anchor flange is cast directly into concrete, creating mechanical interlock that prevents shifting under load.
Before pouring concrete, verify frame position, level in all directions, and check fastener hole alignment. Repositioning after pouring is nearly impossible.
Mix standard 3,000 PSI concrete and pour around the frame. Use a concrete vibrator to eliminate air pockets and tap the frame gently to help concrete settle.
Allow concrete to cure for 7 days for full strength. Keep the area dry and don't load the hatch until curing is complete.
For existing finished floors, bolt the frame instead. Drill fastener holes, use grade 8 bolts with lock washers, and tighten in a star pattern. Check level frequently to avoid lifting the frame.
Waterproofing and Moisture Barrier Integration
Proper waterproofing prevents water infiltration, which shortens system life and creates facility problems.
Floor Door – Acudor FA-300 Aluminum →
The gasket around the hatch door provides the primary seal. But moisture barriers at the frame joint provide critical secondary protection. Use a flexible, waterproof sealant, not rigid caulk that cracks as the building settles.
Apply sealant to the entire perimeter of the frame before casting concrete. Work it into the joint between frame and subfloor. A bead roughly 1/4 inch thick provides adequate coverage. Smooth it with a wet finger or caulk tool to ensure complete contact.
For finished floors, install a vinyl gasket tape around the frame perimeter. This tape sits between the frame and floor surface, blocking water from running down along the frame edge. Peel-and-stick gasket tape installs quickly and requires no additional tools.
If your application involves standing water or high-moisture environments (mechanical rooms, basements below grade), specify a hatch with an integral gasket. These models include a rubber seal around the door perimeter that compresses when the hatch closes, creating a watertight seal. The Acudor FA-300 Aluminum Angle Frame floor door is designed for interior and exterior applications where watertightness is not required.

Check the gasket annually. Replace it if you notice cracking, hardening, or visible gaps. A worn gasket allows water to penetrate, potentially causing structural damage or equipment failure.
Hinge Adjustment, Latch Mechanism, and Load Testing
Once the frame is secured and concrete has cured, install the door panel and verify all moving parts function correctly.
The hinge mechanism must support the full weight of the door panel. Most commercial floor doors use heavy-duty hinges rated for 300 pounds per square foot (PSF) or higher. Check your specifications, undersized hinges cause the door to sag and bind.
Install hinges according to the manufacturer's instructions. Fasteners must be tight but not over-tightened, which strips threads or bends the hinge bracket. Test the door swing through its full range. It should open smoothly without resistance.
Adjust the automatic hold-open arm so the door stays fully open without slamming shut. A properly adjusted arm holds the door at 90 degrees with moderate hand pressure required to close it. If the arm is too tight, it strains the hinge. If too loose, the door swings closed unexpectedly.
The cylinder lock or latch mechanism must engage smoothly. Apply a small amount of dry lubricant (PTFE-based, not oil) to the lock cylinder. Cycle the lock 10 times to distribute lubricant. The key should turn smoothly without binding.
Load testing verifies the hatch meets its rated capacity. Place calibrated weights on the door panel in a distributed pattern. For a 300 PSF rated door, this equals roughly 1,200 pounds on a 4-by-4-foot opening. The door should not deflect more than 1/4 inch under load. If deflection exceeds this, the frame may not be properly secured or the door panel may be damaged.
Document load test results. Keep these records as proof of compliance for facility inspections or insurance purposes.
Recessed Floor Door Maintenance Tips and Troubleshooting
Regular maintenance extends the life of your recessed floor access doors and prevents operational failures.
Inspect the hatch monthly. Look for visible damage, rust, or corrosion on the frame and door panel. Check that the gasket sits flush around the entire perimeter. If you notice gaps or hardening, schedule gasket replacement.
Clean the frame and door surfaces quarterly.
Common issues and fixes:
Door binds or sticks. This usually means dirt in the hinge or misaligned frame. Clean the hinge area thoroughly. If binding persists, the frame may have shifted. Check level and adjust shims if necessary.
Common Installation Mistakes to Avoid
Learning from others' mistakes saves time, money, and headaches.
Mistake 1: Skipping the level check. An out-of-level frame causes the door to swing open or closed on its own, creates binding, and accelerates wear on hinges. Verify level before, during, and after installation.
| Common Mistake | Root Cause | Prevention |
|---|---|---|
| Out-of-level installation | Skipped leveling checks | Verify level before, during, and after installation |
| Water leaks at frame joint | Missing or delayed sealant | Apply waterproofing before concrete curing |
| Door binding or sticking | Dirt in hinges or frame misalignment | Clean regularly and check frame level |
| Fastener failure | Corrosion or over-tightening | Use appropriate fastener type and tighten firmly but not excessively |
| Gasket deterioration | Age or UV exposure | Inspect annually and replace worn gaskets |
| Load capacity failures | Overloading undersized hatch | Verify facility loads match hatch rating |
Frequently Asked Questions
What are the structural requirements for installing a recessed floor access door?
Recessed floor doors must be anchored to a concrete slab or subfloor with sufficient load-bearing capacity. The frame perimeter requires proper anchorage, either cast into concrete or bolted to existing structure. Check the manufacturer's specifications for load capacity (typically 150-300 lbs per square foot). The rough opening must match the door frame dimensions exactly, and the slab must be structurally sound with no cracks or voids that could compromise the installation.
How do you ensure a recessed floor access door is flush with the finished floor?
Measure the finish floor height before installation and adjust the frame height accordingly. The door panel should sit level with the carpet insert, vinyl tile, or finished surface. Use leveling shims during the concrete casting phase to account for floor slope. After the concrete sets, test the door's closure, it should seal evenly around the gasket without gaps. If needed, plane or trim the door panel edges slightly to achieve a flush fit with the surrounding finish floor.
What tools are required for installing a floor access hatch?
Essential tools include a tape measure, level, drill with bits, socket wrench set, adjustable wrench, pry bar, and fasteners (bolts or concrete anchors depending on your installation method). For concrete casting, you'll need a concrete mixer or ready-mix concrete, a trowel, and a float. A mallet or hammer helps seat the frame during positioning. Safety equipment, gloves, safety glasses, and a dust mask, is mandatory throughout the process.
Can recessed floor doors be installed in concrete and tile, and how does moisture sealing work?
Yes, recessed floor doors work in both concrete and finished floors like tile or vinyl. For concrete installations, the frame is cast directly into the slab. For existing finished floors, retrofit kits allow mounting to the subfloor. Always install a moisture seal, a gasket or rubber weatherstrip around the frame perimeter, to prevent water infiltration. This is critical in areas prone to spills or moisture exposure. Check that the gasket compresses evenly when the door closes to ensure a watertight seal.