
Table of Contents
- Start with the Right Roof Hatch Size and Curb Height
- Aluminum vs Steel Roof Hatches: Which Material Fits Your Building?
- OSHA Roof Hatch Safety Standards You Must Meet
- Compare Popular Commercial Roof Hatches Side by Side
- Commercial Roof Hatch Installation Guide: Getting a Weather-Tight Seal
- Common Mistakes to Avoid When Specifying a Roof Hatch
- Conclusion
- Frequently Asked Questions
Last Updated: September 9, 2026
Choosing the right commercial roof hatches ties together worker safety, building code compliance, and long-term maintenance costs. A roof hatch is the primary access point for routine HVAC service, roof inspections, and emergency repairs, so a poor specification can create hazards and expensive problems for decades. At Victory Construction Products, we have distributed access hardware for over 27 years and have seen how a few specific choices determine whether a hatch performs flawlessly or becomes a recurring headache.

Work backward from your building's actual needs: the size of the access opening, the roof structure, the climate, and the safety requirements of the workers who will use it. This guide covers sizing, material selection, safety compliance, and installation so you can specify with confidence, and highlights common specification errors that lead to leaks, corrosion, and code violations.
Start with the Right Roof Hatch Size and Curb Height
The clear opening size is the single most important specification because it dictates what equipment and personnel can pass through. For general maintenance access where workers climb a ladder, a common clear opening is 2 feet 6 inches by 3 feet; moving equipment or large tools requires a larger single-leaf or double-leaf configuration.
Curb height matters just as much. The curb is the vertical extension that raises the hatch cover above the roof surface, and it must be tall enough to accommodate the roof insulation thickness and the height of the roof membrane flashing. A curb that is too short forces the flashing to bend at an awkward angle, inviting leaks and premature membrane failure.
Measure the Clear Opening, Not the Rough Opening
A frequent mistake is ordering based on the rough opening cut into the roof deck rather than the clear opening of the hatch itself. The clear opening is the actual unobstructed space available for passage, always smaller than the rough opening because the curb and frame take up space. Verify the manufacturer's specified clear opening dimensions against the equipment or personnel that must pass through, then cut the roof deck to match the rough opening requirements in the product submittal.
Aluminum vs Steel Roof Hatches: Which Material Fits Your Building?
Material selection is a trade-off between corrosion resistance, structural strength, and cost. Galvanized steel is the most common and economical choice for commercial roof hatches, offering excellent structural rigidity for large openings and high-traffic applications. Steel hatches are heavy and durable, but the galvanized coating can eventually wear, especially in coastal or industrial environments where salt or chemicals accelerate corrosion.
Aluminum offers superior corrosion resistance and lighter weight, making installation easier and reducing structural load on the roof. It is the better choice in coastal climates, chemical plants, or any environment where moisture is persistent. The trade-off is that aluminum is generally more expensive and may not be as rigid as steel for very large spans, so it is often paired with heavier gauge material for structural support.
OSHA Roof Hatch Safety Standards You Must Meet
The regulatory landscape for roof hatches is split between two distinct authorities, and confusing them is a common specification error. OSHA (Occupational Safety and Health Administration) regulates employer practices and worker safety on the job site, while the International Building Code (IBC) governs the physical construction and structural integrity of the hatch itself. A hatch can be fully IBC-compliant yet still fail OSHA requirements if the employer does not provide proper fall protection.
OSHA Requirements: Protecting the Worker
OSHA's general industry standard for walking-working surfaces (29 CFR 1910.28) requires that any opening in a roof deck larger than 12 inches be protected (osha.gov). When a roof hatch is open, it creates an unprotected edge that poses a fall hazard. OSHA does not mandate a specific type of fall protection for roof hatches; instead, it requires that employers implement a system that prevents falls. The most common compliant approaches are:

- Fixed ladder safety systems: If workers use a fixed ladder through the hatch, the ladder must have a personal fall arrest system or a ladder safety system if it extends more than 24 feet above a lower level.
- Guardrail systems: A temporary or permanent guardrail can be erected around the open hatch. OSHA requires top rails at 42 inches (plus or minus 3 inches) and mid-rails that withstand a 200-pound force (osha.gov).
- Personal fall arrest systems (PFAS): Workers can be tied off to an anchor point rated for 5,000 pounds per worker (osha.gov). Many commercial hatches now include integrated anchor points or are designed to accept a davit arm system.
A practical safety feature is a spring-assisted cover with a one-hand operation mechanism, allowing a worker to open the hatch while maintaining three points of contact on the ladder, directly reducing the risk of a fall during the transition from ladder to roof. Safety grab bars that extend below the opening are another OSHA-aligned feature, providing a handhold while the worker steps through the opening.
IBC Requirements: Protecting the Building
The International Building Code addresses the hatch as a structural and fire-resistive element. Key IBC provisions that affect hatch specification include:
- Structural loads (Chapter 16): The hatch and its curb must withstand the same wind, snow, and seismic loads as the surrounding roof. In high-wind zones, this means verifying the hatch has an engineered wind-uplift rating that matches the roof assembly.
- Fire-resistance ratings (Chapter 7): If the roof hatch penetrates a fire-resistance-rated roof assembly, the hatch must have a fire-resistance rating equal to the roof. This is rare, but it matters for buildings with special occupancy classifications.
- Means of egress (Chapter 10): If the hatch serves as a point of egress, it must meet specific opening dimensions and operational requirements. Most commercial roof hatches are not designed as primary egress points, but if yours is, the clear opening must be at least 24 inches wide and 24 inches high.
The Intersection: Where OSHA and IBC Overlap
The critical overlap is fall protection. The IBC references OSHA standards for fall protection in its Chapter 33 (Safe Construction) for the construction phase, but once the building is occupied, OSHA's general industry standards take precedence. A building owner must ensure that the hatch is not only structurally sound (IBC) but also that the workplace procedures and equipment around it meet OSHA standards. For example, if a hatch is located near a roof edge, OSHA may require a guardrail around the hatch opening itself to prevent a worker from stepping backward into the opening; the IBC does not dictate this.
A common pattern is that building owners install a high-quality hatch but fail to provide the surrounding safety infrastructure, such as a guardrail system or a PFAS anchor point, that OSHA requires. This gap is a leading cause of citations and, more importantly, preventable injuries. When specifying a hatch, review both the product's IBC compliance documentation and your site-specific OSHA fall protection plan to ensure they work together.
Compare Popular Commercial Roof Hatches Side by Side
Comparing hatches based on construction details reveals where manufacturers cut corners. The table below outlines the key differences between the models we stock, all of which are designed for weather-tightness and safe operation.
| Model | Material Options | Starting Price | Key Features | Best For |
|---|---|---|---|---|
| Bilco Roof Hatch | Galvanized steel, aluminum, stainless | $1,480.00 | One-hand spring-assisted operation, safety grab bar | Facilities prioritizing worker safety |
| Acudor Roof Hatch | Galvanized steel, aluminum | $1,347.00 | Economical, durable construction | Cost-conscious general access |
| Dur-Red Roof Hatch | 14-gauge steel or aluminum | $1,285.00 | Fully welded curb, heavy-duty 3/16-inch hinges | High-traffic and heavy-use roofs |
| Elmdor Galvanized Steel | Galvanized steel | $1,340.00 | Ease of installation, durable design | Contractors needing quick setup |
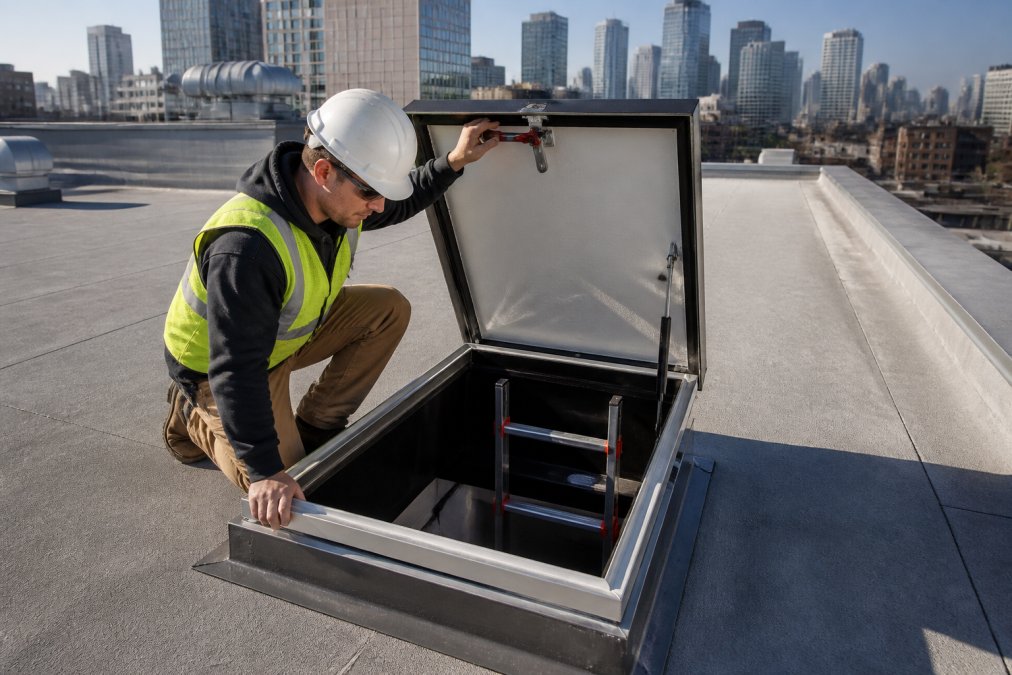
When you compare commercial roof hatches, pay close attention to the hinge mechanism and the lid construction. A hatch with a fully welded, ground-smooth curb provides a much better weather-tight seal than one with bolted or spot-welded corners. The thickness of the metal is also critical; 14-gauge steel is standard for durability, while lighter gauge materials may flex and compromise the seal over time.

For most projects, the Bilco Roof Hatch is our top pick because its one-hand operation is a genuine safety feature. Workers can maintain three points of contact with the ladder while opening the hatch, directly addressing the most common fall hazard. The availability of stainless steel construction also makes it suitable for the most corrosive environments.
Commercial Roof Hatch Installation Guide: Getting a Weather-Tight Seal
Proper installation is where most roof hatch failures originate, and the problem is usually a compromised seal. A roof hatch is only as good as its flashing, the metal or membrane that bridges the gap between the hatch curb and the roof membrane. The goal is to create a continuous, watertight barrier that directs water away from the opening.
Start by verifying that the roof deck is structurally sound and that the rough opening matches the manufacturer's specifications. Set the hatch in place and check that it is level, using shims if necessary. The curb must be securely fastened to the roof structure to handle both wind uplift and the structural load of workers and equipment.
The flashing sequence is critical. The roof membrane should extend up the side of the curb, and a counter-flashing system should cover the top edge of the membrane to prevent water from seeping behind it. Use weather-tight gaskets at all fastener points and seal all joints with a compatible sealant. Properly installed, the hatch should shed water completely; improperly installed, it will leak for the life of the roof.
Common Mistakes to Avoid When Specifying a Roof Hatch
The most expensive mistakes in roof hatch specification are not the ones that cause immediate failure, they are the ones that compound over the hatch's 20- to 30-year service life. Beyond structural load, thermal performance, and security, specifiers often overlook the long-term maintenance reality and the total cost of ownership. Here is a breakdown of the most common errors, ranked by their lifecycle impact.
Mistake 1: Ignoring the Maintenance and Lifecycle Cost Equation
The initial purchase price of a roof hatch is a small fraction of its total cost of ownership. A galvanized steel hatch may cost $1,300 to $1,500, but if installed in a coastal environment without proper corrosion protection, it may need replacement in 10 to 12 years. An aluminum hatch may cost 15-20% more upfront, but its service life in the same environment can exceed 25 years. The math favors aluminum in corrosive environments, yet many specifiers default to steel based on first cost alone.
A more significant lifecycle cost is the labor associated with maintenance. A poorly designed hatch with exposed fasteners, non-gasketed curb joints, or a single-point latching mechanism will require regular attention. A maintenance checklist for a standard commercial hatch should include:
- Quarterly: Inspect the lid gasket for compression set or cracking. Replace if it no longer forms a continuous seal.
- Semi-annually: Lubricate all hinges, springs, and locking mechanisms with a silicone-based lubricant. Do not use petroleum-based products, as they degrade rubber gaskets.
- Annually: Check the curb-to-roof flashing for cracks or separation. Verify that all curb fasteners are tight and that the counter-flashing is secure.
- After major storms: Inspect for wind-uplift damage, debris impact, and water ponding on the lid.
Mistake 2: Overlooking Climate-Specific Engineering Requirements
A roof hatch that performs well in a mild climate can fail prematurely in an extreme environment. Specifiers often choose a standard product without verifying that it is engineered for the specific loads and conditions of the project site.
- High wind zones: In areas subject to hurricane-force winds, the hatch must have a wind-uplift rating that matches or exceeds the roof assembly's rating. Look for hatches that have been tested to ANSI/FM 4474 or similar standards. A standard hatch with a single-point latch may not withstand the negative pressure created by high winds over a large roof surface.
- Heavy snow loads: The hatch lid must be rated for the design snow load of the building. A lid that is not structurally rated for snow accumulation can deform, breaking the weather-tight seal and allowing water intrusion. In snow country, also consider a hatch with a steeper lid slope to shed snow and ice more effectively.
- Coastal salt-air corrosion: Salt air attacks galvanized coatings and can cause white rust on aluminum. For coastal installations, specify a hatch with a marine-grade finish, such as a powder-coated aluminum or stainless steel hardware. The cost premium is typically 10-15%, but it prevents the need for full replacement in a decade.
Mistake 3: Underestimating the Thermal Performance Requirements
A roof hatch is a large opening in the building envelope, and without proper thermal insulation, it becomes a major source of heat loss and condensation. The U-factor of a standard, uninsulated metal hatch can be 10 times worse than the surrounding insulated roof, leading to two problems: energy loss and condensation.
Condensation is the more insidious issue. When warm, humid interior air contacts a cold metal hatch lid, moisture forms and drips into the building, damaging ceiling tiles, promoting mold growth, and creating a slip hazard on the ladder. Look for hatches with:
- Insulated, double-wall lids with a minimum of R-10 insulation value.
- A thermal break in the curb, a non-metallic barrier that prevents the cold from conducting from the exterior curb to the interior frame.
- A condensation drip gutter around the interior perimeter of the hatch that channels any moisture away from the opening.
In climate zones with extreme temperature swings, these features are not optional upgrades; they are necessary for maintaining indoor air quality and preventing structural damage.
Mistake 4: Treating Security as an Afterthought
A roof hatch is a potential security breach point. The standard inside/outside handles with padlocking provisions are the minimum requirement, but they are not a serious security measure, a padlock can be cut with bolt cutters in seconds. For hatches accessible from the ground, from a neighboring building, or from a fire escape, consider:
- Cylinder locks that are keyed to the building's master key system.
- Tamper-resistant fasteners on the hinge side to prevent hinge pin removal.
- A microswitch or contact sensor that triggers an alarm when the hatch is opened.
A common pattern is that the roof hatch is the least-protected entry point, even though it provides direct access to the roof and, in many cases, to the building's mechanical systems. A small investment in a better locking mechanism is far less expensive than the cost of a security breach.
Conclusion
Specifying the right commercial roof hatch comes down to matching the product to your building's structural, climatic, and safety demands. Size the clear opening correctly, choose a material that resists your local environment, and verify that the hatch meets OSHA fall protection standards and IBC structural requirements. Installation is where performance is won or lost, so invest the time in a proper flashing detail.
Getting the specification right is only half the battle; sourcing the product quickly is the other half. Victory Construction Products stocks roof hatches from 15 trusted brands, including Bilco, Acudor, Dur-Red, and Elmdor, with warehouses in 11 states to ensure fast delivery. Our lowest-price guarantee and same-day shipping on most in-stock orders keep your project on schedule. Add the hatch that fits your specs to your cart and get the job done right.
Frequently Asked Questions
What are the OSHA requirements for roof hatches?
OSHA requires that any roof opening where workers can fall more than 6 feet be protected. For roof hatches, this means the hatch must have a guardrail system, safety railing, or be closed when not in use. The hatch opening itself must be covered when access is not needed, and fall protection like a safety grab bar or ladder access is required. Per OSHA roof hatch safety standards, the hatch cover must support the weight of any worker who steps on it and must open fully for safe passage.
How do I determine the correct size for a roof hatch?
Measure the equipment that needs to pass through the opening, then add clearance for a worker to climb through safely. Standard commercial roof hatches offer clear openings from 2'-6" x 3'-0" up to 2'-6" x 8'-0" for single-leaf models, with double-leaf options for larger equipment. Match the hatch dimensions to your ladder access requirements. The curb height also matters: taller curbs are needed when replacing an existing hatch or when the roof membrane has built up over time.
What is the difference between aluminum and steel roof hatches?
Galvanized steel roof hatches are the most common choice for commercial buildings because they offer high structural load capacity at a lower cost, and the zinc coating provides corrosion resistance. Aluminum roof hatches cost more but are lighter, making them easier to install, and they offer superior corrosion resistance in coastal or chemical environments. For most general commercial applications, galvanized steel is the practical choice. Choose aluminum when weight is a concern or the hatch is exposed to salt air or corrosive atmospheres.
How do I ensure a commercial roof hatch is weather-tight?
A weather-tight seal starts with proper installation. The hatch curb must be mounted level and securely fastened to the roof deck before the roof membrane is applied. Flashing must extend up the curb height and be sealed with compatible roofing cement. Look for hatches with weather-tight gaskets around the lid perimeter and a compression seal when closed. After installation, test the hatch by closing it and running water over the lid. Inspect the gaskets annually and replace them if cracked or compressed.