
Table of Contents
- Why Wall Access Panels Are Regulated by Building Codes
- IBC Fire-Rated Access Door Requirements
- Fire-Rated Access Panel Installation Best Practices
- Minimum Size for Wall Access Panels
- Access Panel Inspection Checklist
- Choosing the Right Wall Access Panel for Your Application
- Frequently Asked Questions
Last Updated: September 20, 2026
Why Wall Access Panels Are Regulated by Building Codes
A wall access panel is a hinged or removable door installed in a wall or ceiling to provide inspection and service access to concealed mechanical, plumbing, or electrical components without demolishing the surrounding assembly. Because these panels interrupt the wall assembly, they are regulated by building codes.
International Code Council overview of the International Building Code
IBC Fire-Rated Access Door Requirements
The International Building Code governs where fire-rated assemblies are required, and access doors installed in those assemblies must carry a matching fire-resistance rating. The IBC itself doesn't certify products; it references recognized testing standards, and manufacturers demonstrate compliance through third-party listings.
When a Fire-Rated Assembly Is Required
A fire-rated assembly is required wherever the IBC classifies a wall, partition, floor, or ceiling as a fire barrier, fire partition, or horizontal assembly. Common locations include corridor walls, shaft enclosures, exit stairwells, and separation walls between occupancies. If the wall carries a rating, any access door in that wall must carry the same rating.

UL Certification and Labeling
UL certification is the third-party verification that an access door has passed the applicable fire test. Look for the UL label on the door and frame, and confirm the label states the rating and the assembly type it was tested in. A door labeled for wall use only should never be installed in a ceiling, and vice versa.
UL Solutions fire-resistance ratings and testing standards
Fire-Rated Access Panel Installation Best Practices
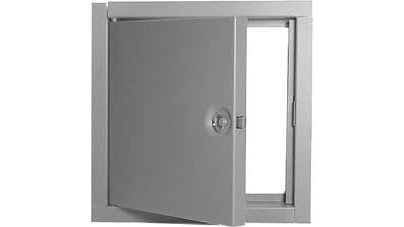
Installation determines whether a listed door actually performs. A fire-rated access panel is not a standalone product, it is one component of a tested assembly, and the rating only exists when the panel is installed exactly as the listing describes. Deviate from the listing and the label becomes meaningless, even though it is still physically attached to the door.

The Installation Sequence That Passes Inspection
A common pattern that passes inspection follows this order:
- Confirm the assembly rating and the door label match. A 1-hour corridor wall needs a door labeled for 1 hour in a wall assembly. A 2-hour wall needs a door rated for that exposure.
- Verify the rough opening dimensions against the listing. An opening that is too large cannot be corrected by sealant alone.
- Install blocking or framing to receive the frame fasteners. The listing assumes the frame is anchored to structure, not to unsupported drywall.
- Set the frame plumb and square, then fasten per the listed spacing. Over-torquing fasteners can distort the frame and prevent the door from latching.
- Seal the perimeter with the firestop system specified for that assembly. Sealant type matters, an intumescent sealant and a standard caulk are not interchangeable.
- Verify self-closing and self-latching operation through the full swing, then document the installation with photos and the listing on file for the authority having jurisdiction.
Why the Perimeter Seal Is Not Optional
The gap between the frame and the rough opening is a penetration in a rated assembly. That penetration must be protected by a firestop system tested to the same standard as the wall. Most practitioners find that perimeter sealing is the single most commonly skipped step, because the door looks finished once it latches. A painted-over or missing label and an unsealed perimeter are the two defects an inspector is most likely to catch.
Retrofitting vs. New Construction
Retrofitting a rated wall is harder than new construction, and most published guidance skips it entirely. In new work, the framing and drywall are open, so blocking and the panel can be installed to match the listing from the start. In a retrofit, you are cutting into a finished, already-rated assembly, and you must restore the rating around the new opening.
A workable retrofit sequence looks like this:
- Locate the assembly in the approved plans or the original listing to confirm what rating you are restoring.
- Cut the opening to the rough opening dimension in the door's listing, no larger.
- Add blocking behind the drywall to receive the frame fasteners, working through the opening.
- Install the frame and door per the listing, then seal the perimeter with the specified firestop system.
- Document the assembly, product data, listing, and photos, and submit to the authority having jurisdiction before closing out the permit.
Local Jurisdiction Variance
Codes set the floor, not the ceiling. Local jurisdictions can adopt amended versions of the IBC, add their own requirements, or interpret access requirements differently. The authority having jurisdiction has the final say on what passes inspection. Before ordering panels for a project, confirm the local amendment and get the submittal approved. A submittal package that includes the door listing, the firestop system data sheet, and the installation instructions moves through review far faster than a label photo alone.
Minimum Size for Wall Access Panels
There is no single code-mandated minimum size for a wall access panel. The size is driven by what has to pass through or be serviced through the opening, and by the requirements of the trades that need access. That is not a dodge, it is the actual rule. Codes require access; they do not specify a panel dimension. The equipment inside the wall sets the minimum.
How to Size a Panel in Practice
Work backward from the component, not forward from a catalog page. A reliable sequence:
- Identify the component the panel exists to serve, a valve, a cleanout, a damper, a control, a junction box.
- Measure the component's operating envelope, not just its body. A valve needs room for a wrench swing; a damper needs room for its actuator and linkage; a cleanout needs room for a rodding tool.
- Add working clearance on all sides. Most practitioners allow several inches beyond the component on the sides the technician must reach through.
- Confirm the rough opening the selected panel requires, and verify it fits between the framing members without cutting structure.
- Check the assembly rating, if the wall is rated, the panel must carry a matching rating at that size. Not every listed door is available in every dimension.
Plumbing and Mechanical Access Requirements
Plumbing codes require access to valves, cleanouts, and backflow preventers so they can be serviced without destructive demolition. Mechanical codes require access to dampers, controls, and equipment for inspection and maintenance. In both cases, the code requires access, it does not dictate the panel size. The size follows from the service task.
A few practical drivers:
- A shutoff valve needs enough opening for the valve body plus a wrench swing. A panel sized to the valve body alone will not let a technician turn it.
- A cleanout needs room for a rodding tool to enter at the required angle, which often makes the opening longer than it is wide.
- A fire or smoke damper needs access to the actuator, the linkage, and the reset mechanism. Dampers are frequently the largest driver of panel size in a rated wall.
- A backflow preventer needs clearance for testing and for the test cock fittings, which protrude further than the body.
| Access Need | Typical Driver of Panel Size | Code Basis |
|---|---|---|
| Plumbing valve or cleanout | Valve body, wrench swing, rodding angle | Plumbing code access requirements |
| Mechanical damper or control | Damper frame, actuator, linkage, reset access | Mechanical code access requirements |
| Fire-rated wall penetration | Matching the assembly rating at the required size | IBC fire-resistance requirements |
| Electrical junction or panel | Working clearance and conductor bend radius | Electrical code working-space requirements |
When Size and Rating Conflict
A frequent problem: the equipment needs a panel larger than the largest listed size available for that wall rating. When that happens, the options are to relocate the component, split the access into two smaller listed panels, or work with the manufacturer on a custom listed assembly. Field-cutting a larger opening and installing an unlisted door is not one of the options, it voids the rating and will fail inspection.
Access Panel Inspection Checklist
Inspection is where the paperwork meets the wall. Use this checklist before you call for inspection.
- Confirm the wall assembly rating matches the door label rating
- Verify the UL label is intact and legible
- Check that the door is rated for the correct application (wall vs. ceiling)
- Confirm fasteners match the listing
- Inspect perimeter for gaps and missing fire-stop sealant
- Verify the door self-closes and self-latches
- Confirm submittals and listings are on file for the AHJ
Visual Inspection Checklist
A visual inspection catches most problems before the AHJ does. Look for a missing or painted-over label, a door that doesn't latch, gaps at the frame, and any field modification that wasn't part of the listing. If the label is gone, the rating can't be verified, and the door will likely fail.
Choosing the Right Wall Access Panel for Your Application
Match the panel to the assembly, not to the price. A wall-rated door in a rated wall, a ceiling-rated door in a rated ceiling, and a label that matches the assembly rating are the three non-negotiables.
Frequently Asked Questions
Are access panels required by code?
The International Building Code (IBC) and International Mechanical Code (IMC) do not mandate access panels universally, but they require access to concealed equipment like valves, dampers, and controls. When equipment is concealed behind a wall or ceiling, code-compliant access panels become the practical solution. Local jurisdictions may add specific requirements, so always verify with your authority having jurisdiction (AHJ) before finalizing your wall access panel schedule.
What is the minimum size for a wall access panel?
There is no single code-mandated minimum size for wall access panels. The panel must be large enough to allow safe inspection, maintenance, and replacement of the concealed equipment. For plumbing and mechanical access, a common rule is that the opening must permit removal of the largest component. Many specifiers use 12 x 12 inches as a practical minimum for valve access, but the actual size depends on what is behind the wall and local code enforcement.
Do ceiling access panels need to be fire-rated?
Ceiling access panels must be fire-rated when they penetrate a fire-resistance-rated ceiling assembly, such as a floor/ceiling separation in a commercial building. The IBC requires that any penetration in a fire-rated assembly maintain the assembly's rating. Fire-rated ceiling panels carry labels for specific hourly ratings, often up to 3 hours for noncombustible floor/ceiling systems. Standard non-rated panels are only acceptable in ceilings that are not part of a rated assembly.
How do I ensure my access panel installation passes inspection?
To pass inspection, use a listed and labeled fire-rated access panel when penetrating a rated wall or ceiling, install it according to the manufacturer's instructions, and maintain the fire-resistance rating of the assembly. Keep submittals and UL certification documentation on site. Inspectors typically verify the label, the gap between the panel and frame, latching operation, and that plumbing and mechanical access meets code. A pre-inspection checklist covering these points reduces the risk of a failed inspection.
Access panel compliance comes down to one question: does the panel match the assembly it sits in? Getting that wrong costs time, money, and a failed inspection. Victory Construction Products stocks fire-rated access doors from trusted brands with model numbers, pricing, and submittals available online, plus same-day shipping on most in-stock orders from warehouses in 11 states. Get started with Victory Construction Products and keep your rated assemblies inspection-ready.